How to Use
Before we move to creating campaigns and sending the emails, let's understand the purpose of default folders provided by MuffinBite.
MuffinBite generates 5 folders on the first run. (6th folder i.e. "Logs" is generated when we set debug to "True")
List of folders with explanation:
- Attachments: Place all files you want to use as email attachments or embed inline in HTML templates in this folder.
- Campaigns: Stores all your campaigns. It is recommended **not** to make manual changes here.
- DataFiles: Store all your email records (CSV or Excel files) here for use in your outreach campaigns.
- EmailStatus: Contains the output files generated by MuffinBite, including records of successful and failed emails.
- Templates: Place all your HTML templates in this folder.
- Logs: Stores debug-level information in the
errors.logfile. This file is only created when debug mode is enabled.
With that said, let's create our first campaign to get a better understanding of MuffinBite's power.
I have two files in my attachments folder, profile.jpg, and sailing_ship.pdf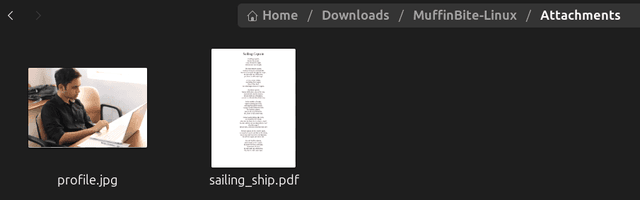 My email template (inside "Templates" folder with the name "test.html") looks like below after rendering in browser.
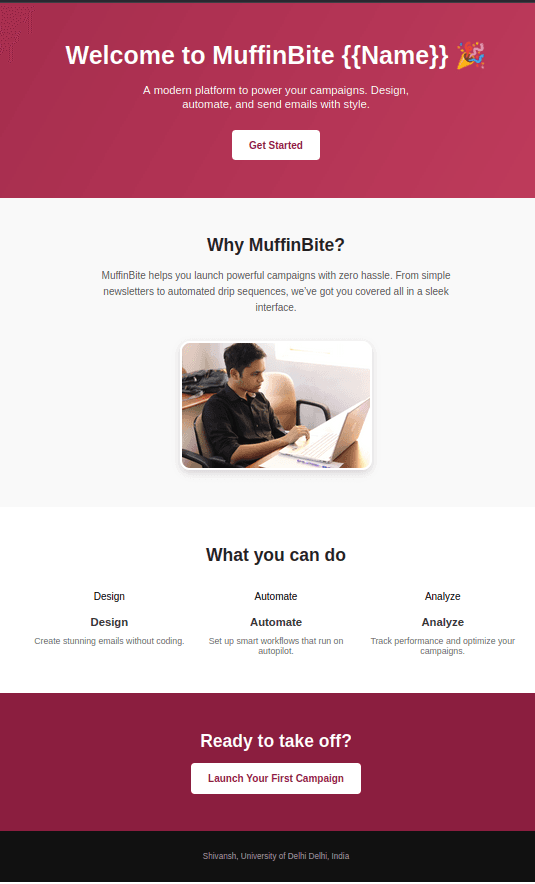
Below is the campaign that we will use:bite> camp --create
Enter name for the campaign: test
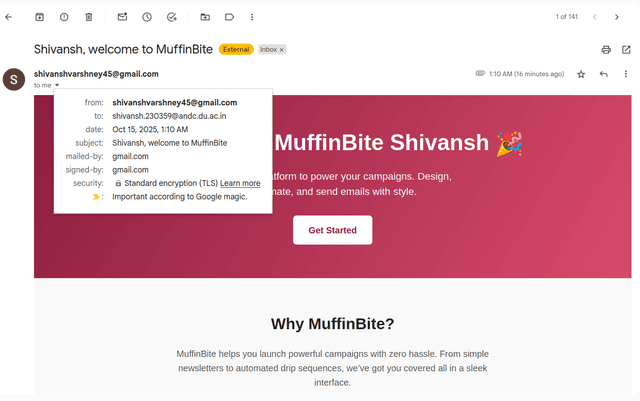
Enter subject line for the email: {{Name}}, welcome to MuffinBite.
Enter template name you want to use: test
Enter attachments, (separated by commas if more than one): sailing_ship.pdf
Enter CC emails, (separated by commas if more than one):
Enter BCC emails, (separated by commas if more than one):
bite>
Now, we will move forward to sending our first email as "test" with the below command: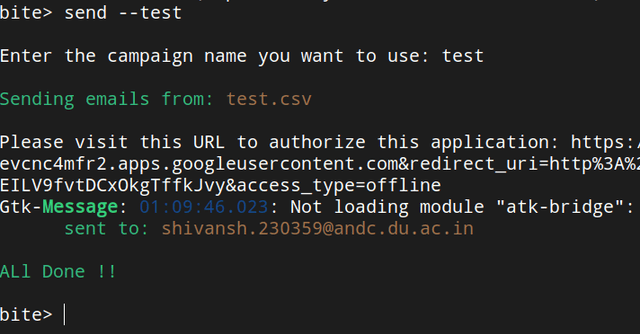 Also, you can see the message on the screen, "Please visit this URL to authorize this application".
When you send emails for the first time, Google asks for authentication for your account, This is a one time thing only.
A browser window will open automatically, just visit the site and allow your own application to send the emails on your behalf.
Note:
This is your own application with the name "muffinbite" that you created on your Google Cloud Console, so there's nothing
to worry about it. Just make sure that you keep your "credentials.json" file safe.
Below you can see that the email has reached the inbox, and {{Name}} has been replaced with actual name of the recipient.